Soil-based watercolor paint is really pretty simple to make yourself. All you need is soil containing some clay plus a few ingredients and tools. Perfecting the craft takes time, but I bet - with a little time and curiosity, you could be well on your way to making your own soil-based watercolor paint.
FULL DISCLOSURE - this isn't a full how to guide to making watercolors - more of an invitation to experiment and try something new on your own. Some internet searching will uncover a wealth of information and links to books readily available if you want to learn more.
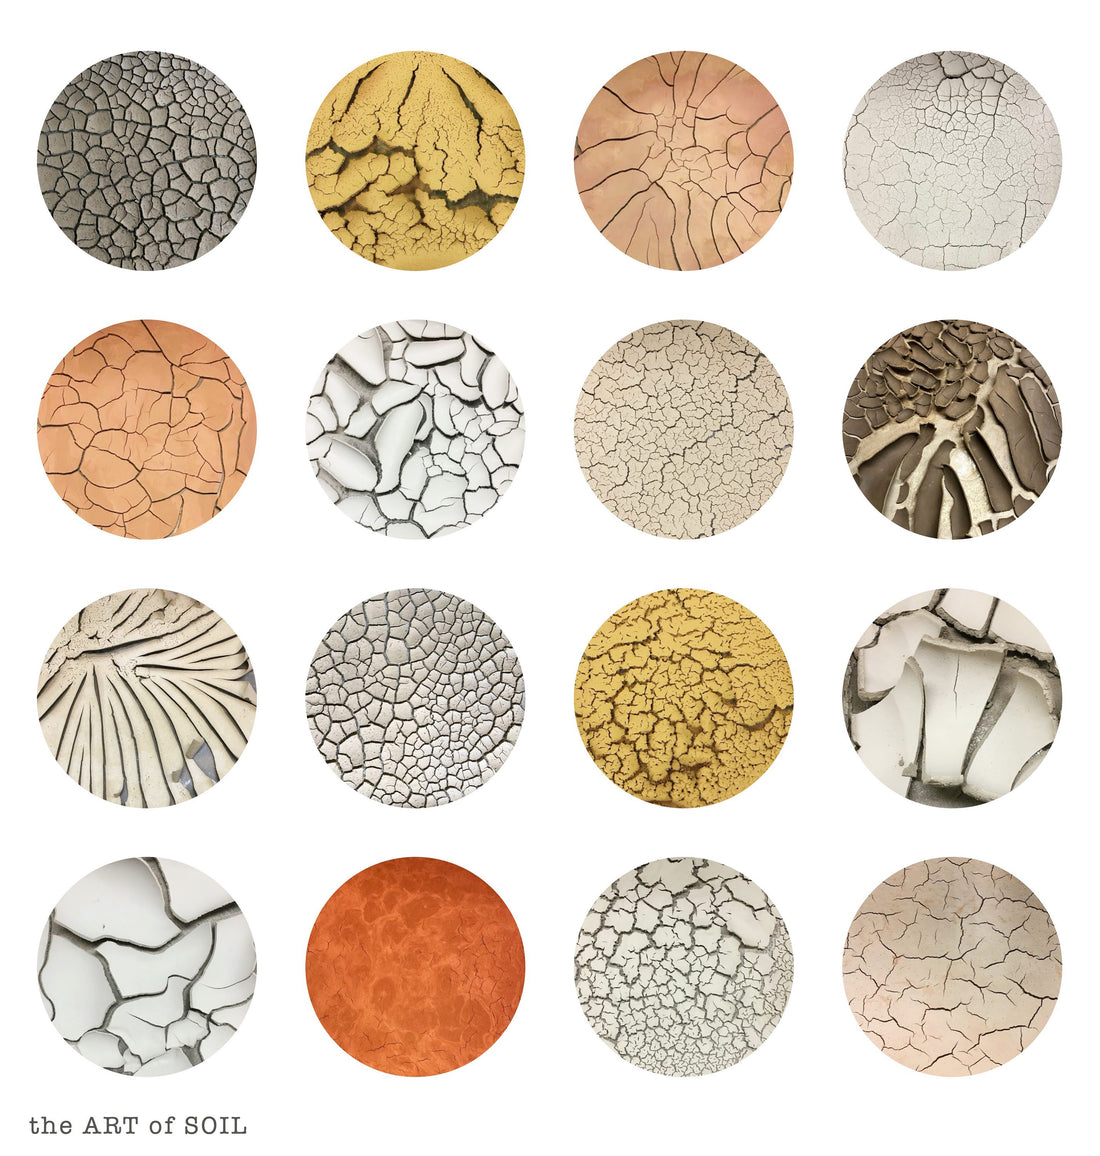
Creating with watercolor paints crafted from soil and minerals results in one of purest forms of artistic expression – one where you are grounded in nature – inspired to create beauty through your own lens. Whether you are a novice artist or a professional – these pigments will elicit emotion and joy as you put brush to paint to surface. Thank you for being part of this soil art community. I’d love to know what you think of the paints and see what you create on your own.
Soils are everywhere - and it's one reason we believe they are often overlooked and receive little notoriety, esteem, or praise. Your first step to making soil-based watercolors ought to be the collection of some soil. Please make sure you have permission to collect this soil - check out the Wild Pigment Projects Guidelines to Reciprocal Foraging. An ideal soil will have some clay in it - you can test this out by wetting the soil and trying to form a ball. If you can toss this ball in the air and it stays intact - you likely have enough clay to separate out to make watercolor paint.
![]()
PART 1: SEPARATING THE CLAY FROM THE WHOLE SOIL
1. Responsibly harvest soil (ensure you have permission to collect soil or geologic material, consider land ownership - past, present, & future, and only take what you plan to work with).
2. Remove any large coarse fragments (rocks) and inundate with water. I use either a large bucket or canning jar. Stir and shake contents vigorously to break up any aggregates (natural peds, clods, or chunks of soil). Let this mixture rest so all aggregates become saturated throughout - stir and shake several more times.
3. Pour contents through a 2-mm sieve to remove any larger organic debris and rock fragments.
4. Stir and shake again, allow to settle for 1-2 minutes - then pour slowly into another container. Regularly feel material to ensure you are not pouring any particles you can feel (even slightly gritty is too coarse - if you feel this - start over and wait longer for the larger, sand and coarse silt-sized particles to settle.
5. Wait 1 or more hours to allow for the separation of water from solids. The more water you remove during this process, the less time the drying process will take. Pour off clear water from the container. Not all soils will separate from the water as well as I've shown in the image below - this all depends on the mineralogy of the material as well as type & amount of salts present.
6. Shake contents of the container and pour into a large flat pan. [Another option is to run the suspension through filter paper (aka coffee filters) - but I struggle with material loss when I do this.] Set to dry in the warm sun or place in an oven at the lowest setting (200 F) until dry. This usually takes < 8 hrs and I turn the oven off overnight and prop the door open. Must have willing housemates who tolerate the earthy aroma (thankfully, I do since I married another soil scientist).

PART 2: CONVERTING CLAY INTO WATERCOLOR PAINT
1. You will need to crush the newly created aggregates that formed during the drying process. Grind using a mortar and pestle to break up any and all aggregates (chunks and clods of soil). Take proper precautions when working with any fine material and wear a mask as the inhalation of small particles of any material can be dangerous.
2. Store the clay for future use and be sure to label it. Even if you are in love with this material and think you will never forget it - label it. Date, location, and what it is. Trust me.
3. Scoop a small amount of clay onto your mulling board (glass board, marble surface) - start with a small amount 1 to 3 tablespoons. Add watercolor media* slowly and mix (with a pie server, butter knife, palette knife, or any other tool that works for you - I love this silicone wedge). *You can buy pre-made watercolor media or make your own - do some research to find out what would be best for you. I make my own using water, gum Arabic, vegetable glycerin, and clove oil.
4. Once seemingly saturated, start mulling (use a glass muller or any heavy, resistant, flat -bottomed surface). Move the paint in any and all directions. Scrape back to center. Mull more. When you feel you can (and should) mull no longer, test the paint on paper. If needed continue mulling. Natural earth pigments will likely surprise you in how much mulling they need. I typically mull 0.5 to 1 hr. Minerals behave differently - that’s part of their wonderful character. Some will be silky smooth and others will make you mad with their sticky gumminess.
5. Once satisfied, transfer your newly, never before created - soil pigments to a container or containers. Allow to dry for long term storage or start creating right away.
